Tips for Painting Wood Floors
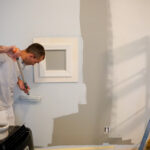
Some people would tell you to never paint a wood floor, just refinish it. But there’s absolutely nothing wrong with painting a wood floor, as long as you don’t expect that two months down the line you’ll want to revert to wood. When you’ve committed to a painted floor, follow these tips to make it look fantastic.
If you know anything about painting, you know that preparation of the surfaces is 80% of the battle. Do prep right, and the rest is pretty much clockwork. With a wood floor, prep is even more important because floors get foot traffic, and foot traffic + bad prep simply isn’t a good recipe.
What you’ll need to paint your wood floor
- Paint brushes and rollers, vacuum, mop, rags and turpentine or similar cleaner for dealing with spills
- 150-grit and 220-grit sandpaper
- Painters tape to block off walls or baseboards that don’t need painting
- TSP or a similar cleaning product
- Fans for placement in windows/doorways for ventilation, as needed and as appropriate
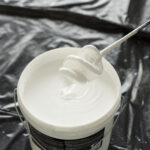
- Wood floor primer
- Paint in the color of your choice that is specifically designed for decks/floors
- Polyurethane finish coating, optional
If you’re not familiar with buying any of these supplies or pieces of equipment, your paint or hardware store associate should be able to help you get exactly what you need.
Painting wood floors, step by step
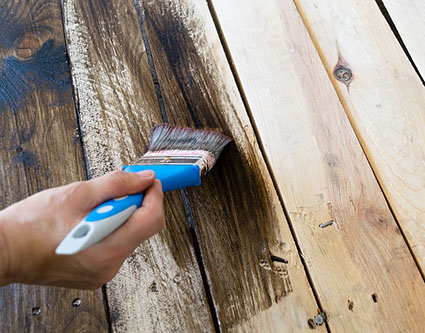
- Sand down the floor by hand or with an electric sander with 150-grit sandpaper. You want to rough-up the surface and remove the original gloss.
- Vacuum and damp-mop the floor to remove all sanding debris. If there are stains on the floor, remove them with TSP or a similar detergent.
- When the floor is perfectly dry, apply a coat of primer designed for wood floors. Follow the instructions on the label. Let dry completely.
- Apply a relatively thin first coat of your paint. Brush in around the perimeter, then roll or bush on the rest. Remember to paint yourself backwards toward a doorway. Let the paint dry.
- Use 220-grit sandpaper to smooth out the surface and add a sleek appearance. Vacuum and damp-mop the floor like you did before.
- Apply a second (and possibly final) coat. After it thoroughly dries, you’ll be able to tell if you need a third coat.
- When the floor is painted to your satisfaction, you may want to add a coat of polyurethane sealant, particularly if the floor will get heavy foot traffic.
The most important thing to remember
 Ask professional painters what is the one thing that will guarantee a shoddy-looking paint job now and over time, and they’ll tell you: dirty and unprepared surfaces. For this reason, take extra care to make sure your floor is thoroughly clean, free of dust, free of oily stains and blemishes and perfectly dry before starting in on the primer and paint.
If painting your wood floor sounds like a great idea, but you’d rather not do it yourself, you can count on the experts at Franklin Painting of Farmington, CT, to turn out a spectacular finished product for you. For all your interior and exterior painting needs, we’re always ready to exceed your expectations. Reach us with questions or to schedule an appointment at (877) 646-7774.